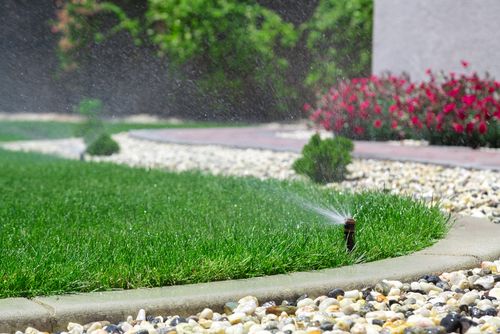
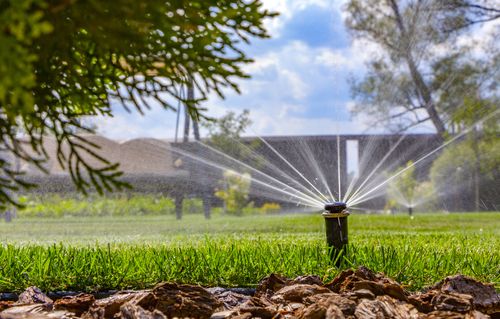
Many clients ask us how to clean sprinkler heads at their property. With this in mind, we decided to create a handy guide, giving you a step by step process which you can follow to ensure a thorough and reliable clean.
There is no point in investing in a high-quality sprinkler system, only to let it fall into disrepair. There is no sense installing such a system at your property, and then wasting large amounts of energy each year through inefficient operation. A little bit of cleaning and maintenance goes a long way and can make sure that your system continues to perform at its best.
Alongside leaks and damage to the pipes themselves, build up of silt and other debris within the sprinkler heads is one of the prime causes of system malfunction. Following our process makes sure that this is not the case for your system.
All you will need is a bowl, a tool for dismantling and reassembling the sprinkler heads – either a hex key or a specific tool provided by the manufacturer at purchase – dishwashing detergent, warm water, and a paper clip. Armed with only this equipment, you can ensure that your sprinkler system keeps on doing its job for longer.

How to Clean Sprinkler Heads: The Cleaning Process
If you have been wondering how to clean your sprinkler heads, help is at hand. The process itself is relatively simple, and, if done right, should provide you with a fully functioning sprinkler system.
This means great results for your garden, and for your household in general. Don’t let your sprinkler system fall victim to debris build up. Read on to find out more about how to clean your sprinkler heads.
Remove the Sprinkler Head
You first need to gain access to the inner components of the sprinkler. For this, you will need a hex key, a screwdriver, or a specially designed sprinkler head key, which you can use to loosen the head itself.
Whichever tool you decide to use, insert it into the head of the sprinkler and then make a clockwise turn to loosen it. After this, the sprinkler head can be removed, allowing access to the nozzle and screens inside.
Remove the Sprinkler Cap
You will be able to remove the sprinkler cap from the nozzle without the use of a hex key or other tool. Simply grip the body of the nozzle and begin unscrewing the cap from the nozzle.
When the cap is unscrewed, it can be removed from the nozzle itself.
Remove the Nozzle
The nozzle can now be removed from the sprinkler housing itself. Simply grip the body of the nozzle again and this time pull directly upwards until it is removed. You will notice the filter at the lower end of the nozzle.
If you are cleaning multiple sprinkler heads at the same time, be sure to mark which nozzle belongs to which sprinkler. This will mean that you do not have to alter or reset your sprinkler settings when it comes to using the system again.
Separate the Screen from the Nozzle
Each nozzle will include a screen component which will need to be removed before cleaning. This can be achieved using a simple paper clip. Grip the paper clip and unfold it to create a long thin piece of wire. Push one end of the wire under one of the squares in the screen and use the wire as a lever to remove the screen.
Prepare the Cleaning Solution
You will need a cleaning solution to make sure that all of the screens are free from dirt and debris. Prepare a bowl of warm water and add a few drops of dish detergent to the water. Mix the solution so that the soap is equally distributed across the solution.
You do not need much dish detergent to achieve a reliable clean, so resist the temptation to go overboard when mixing the solution.
Soak the Screen
Place the screens in the bowl containing the solution. The warm water and detergent will start to act on any grime and dirt trapped in the screens, softening it and loosening it to make it easier to clean away later on.
Leave the screens to soak in the solution for around two minutes. As the screens are interchangeable and will not affect the use of your system, you don’t need to worry about marking which screen belongs to which sprinkler.
Brush and Rinse the Screen
After the solution has acted upon the dirt and grime, it will be much easier to brush this debris away. One at a time, remove each screen from the solution. Use an old toothbrush to brush away any residual grime, cleaning the screen ready for use again.
After brushing, check the screen and then rinse under a heavy stream of water using a faucet or a garden hose. Check the screen again and repeat the brushing and rinsing until you are satisfied that the screen is clear.
Rinse the Nozzle
With the screens cleared of dirt, dust, or grime, it is time to do the same with the nozzle. You do not need to soak the nozzle, as the shape of the component makes it more difficult for debris to become trapped. Instead, simply rinse the nozzle under the same heavy stream of water from a faucet or garden house, taking care to remember which nozzle belongs to which sprinkler.
Clear the Lines
Before returning the components to their respective sprinkler heads, you must first clear the lines to remove any dirt or debris which may be trapped here. First, turn on the water and let it run through the sprinkler system. You should begin to see a dirty stream of water coming out of each sprinkler.
Next, keep checking the sprinkler heads until the stream of water becomes clear. This is your indication that the dirt and grime is cleared from within the lines. Turn the water off.
Reattach the Screen and Nozzle Body
Gather up the freshly washed screens and reattach them to the nozzles. Put each nozzle back into its respective sprinkler head, turning the cap with your hands until each component is secured in place.
Take the hex key tool, screwdriver, or other piece of equipment which you used to dismantle the sprinkler head, and use this to reattach the components within the sprinkler head. The cleaned sprinkler heads will now be ready for use.

Why Do I Need to Clean My Garden’s Sprinkler Heads?
Now that you know how to clean your sprinkler heads, it is important to understand ‘why.’ There are many reasons that make cleaning your garden’s sprinkler heads a necessary task. These range from practical considerations of watering your garden in the right way, to the economic concerns of saving money on your energy bills.
In this section, we will discuss some of the top benefits you can expect after cleaning your sprinkler system.
Better water flow
Why do you have a sprinkler system at your property in the first place? Of course, the answer is to irrigate your lawn or another area properly. If water is not flowing properly because the lines and components are blocked with dirt, your garden is going to suffer.
Cleaning the sprinkler heads helps your garden stay lush, green, and healthy for longer, even in the driest spells of summer.
Effective operation
The lines and water channels of your sprinkler heads are not the only parts which can get clogged with debris. The raising and lowering mechanism can also seize up, causing heads to only partially raise, or even to not raise at all.
This causes further damage to the system, and leaves your garden unwatered.
Increased efficiency
The more effort it takes to push water through your system, the more energy you will have to use. When this additional energy is factored in across the whole year, it can lead to significant annual expense.
Don’t let this happen on your property. Make sure you keep your sprinkler system clean and running effectively. Contact San Diego Pipelining to speak with the plumbing experts today.
A chance to inspect the system
Equipment has a habit of breaking down due to wear and tear, and a sprinkler system is no exception. Cleaning your sprinkler heads gives you a chance to thoroughly inspect the system, and to check that there are no problems or damaged components.
Catching this damage early gives you the chance to fix or replace a malfunctioning part, saving you money in the long run.
Protection from the elements
Heavy rain and other inclement weather can cause silt and debris to build up in even greater concentrations than usual. Regularly cleaning your sprinkler heads protects them from the elements and helps them to continue functioning at a high level, even when the weather gets rough.
For more serious issues such as sewer pipe cleaning and pipelining, Get in touch with the team today!
